Transitions
T1 and T2 are the fourth discipline of triathlon. Most beginners leave 3–5 minutes on the table here — time that costs nothing to recover except a little practice.
📍 What Is a Transition Area?
The transition area is a designated zone — usually a large parking lot or field — where all athletes rack their bikes and store their gear. It opens before the race for setup and closes before the swim start.
You pass through it twice: once going from swim to bike (T1), and once going from bike to run (T2). Transition time counts toward your overall finish time. The clock doesn't stop when you enter transition.
T1 — Swim to Bike
Exit water → run to bike → mount and go. Sounds simple; benefits from rehearsal.
📦 T1 Gear Layout (at your rack)
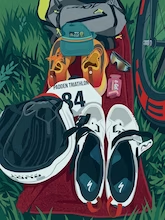
Lay your gear on a folded towel — it marks your space at the rack. Arrange everything in the order you'll need it and within easy reach. Move your gear bag and anything you won't use to the rear. Transition is tight; respect the athletes racked next to you.
🔢 T1 Sequence
- 1.Exit water → begin unzipping wetsuit and pulling off shoulders as you run.
- 2.Enter transition → find your rack row (know your landmark before the race).
- 3.At your bike → peel wetsuit from hips down; step out.
- 4.Dry feet if needed → put on bike shoes.
- 5.Put on helmet → buckle it before touching the bike (USAT rule).
- 6.Put on sunglasses → grab bike and run to mount line.
- 7.Mount at the designated mount line — not before.
Wetsuit Removal Tips
Practice the removal until it feels automatic, not frantic. By race morning you want muscle memory doing the work, not problem-solving under adrenaline. A few reps at home and this goes from dreaded to routine.
- Start pulling off the shoulders while still running from the water.
- At your rack, pull sleeves inside-out off your arms first.
- Push down to waist, sit briefly, peel from hips to ankles in one motion.
- Step out one foot, then use that foot to hold the suit as the other foot pulls free.
- Leave it inside-out — easier to spot in transition clutter.
- Practice this 5 times at home; it should take under 60 seconds.
Finding Your Bike
- Walk the transition area before the race — find your rack, count rows from the entrance.
- Note a physical landmark near your bike: a tree, a sign, the end of a rack.
- Tie a colorful balloon, ribbon, or inflated swim cap to your rack for easy ID.
- Practice the in/out paths: swim exit → rack → bike mount line → run exit.
- Race nerves make familiar landmarks disappear — build this in during setup.
Pro tip: A colorful balloon or ribbon on your rack is the best $2 transition investment. Race nerves reliably make even familiar spaces unrecognizable.
Helmet Rules
- Helmet must be buckled BEFORE you touch your bike to move it.
- Helmet must stay on until your bike is racked in T2.
- Violation: time penalty or disqualification. No exceptions.
- Practice the helmet-first habit at home — it should be automatic.
- If you forget in a race, stop immediately and buckle before moving the bike.
Pro tip: Say 'helmet first' out loud every time you practice transitions. Say it enough times and you'll say it automatically on race day, even through the fog of a swim start.
T2 — Bike to Run
Dismount → rack bike → swap shoes → go. Simpler than T1, but the legs are already tired.
📦 T2 Gear Layout
🔢 T2 Sequence
- 1.Dismount before the dismount line — not after.
- 2.Run bike to your rack; rack it safely.
- 3.Remove helmet; set it on the ground (don't throw — you're tired and will miss).
- 4.Swap bike shoes for running shoes.
- 5.Clip on race number belt (bib to front).
- 6.Grab hat if using; go.
Elastic Laces
- Lock laces (Xtenex, Caterpy, or similar) turn shoes into slip-ons.
- Install the night before the race — set the tension with a practice run.
- Time savings: 20–45 seconds versus tying laces with shaky fingers.
- Test them on at least one training run before race day — heel slippage is a thing.
- Worth $6–10; the single best value upgrade in triathlon.
Pro tip: Test elastic laces on at least one training run before race day. Heel slippage is real if the tension isn't right — discover that in training, not at km 3 of the run.
Race Number Belt
Most first-timers forget to rotate the bib in the chaos of T2. Practice the rotation every single rep at home until it's the first thing you reach for.
- Bib faces back on the bike (not required in all races, but common).
- Rotate bib to the front before exiting T2 for the run.
- Wear it in T1 if you wore it in the swim — just rotate it.
- Many beginners forget to flip the bib at T2 and incur a penalty.
- Check your race rules — most USAT races require front-facing bib on the run.
Dismount Line
There is no glory in a flying dismount at your first race. Dismount safely, rack cleanly, and run well. That's the whole goal, and it's completely doable.
- You must be off your bike (feet on ground) before crossing the dismount line.
- Know where the line is on the course — it's typically 50–100m before T2 entrance.
- Clip out of pedals 200m before the dismount line — plenty of time.
- Crashes at the dismount line are common; leave extra space to the athlete ahead.
- Flying dismounts look impressive but add crash risk with no time benefit for beginners.
⚠️ Common Transition Mistakes
✗ Not walking the transition area before the race
→ Always do a pre-race walk. Find your rack, run the paths, identify landmarks.
✗ Touching the bike before the helmet is buckled
→ Helmet first, every single time. Build the habit before race day.
✗ Sitting down to change gear
→ Stay on your feet. Motion keeps blood flowing; stopping lets fatigue set in.
✗ Putting everything in a bag in transition
→ Lay everything flat and visible, ordered for your sequence. No digging.
✗ Forgetting to flip the race number for the run
→ Put it on correctly in T1 so rotation in T2 is a single motion.
✗ Sprinting too fast out of T2
→ Your legs will feel terrible regardless. Jog the first 400m, then assess.
🔄 Transition Practice Routine
Do this at home once before your race. It takes 20 minutes and is worth more than any gear upgrade.
🔄 T1 Practice
- 1.Set up your bike gear on a towel as you would in transition.
- 2.Put on your wetsuit fully.
- 3.Start a stopwatch.
- 4.Remove wetsuit completely and set aside.
- 5.Put on helmet (buckled), bike shoes, sunglasses.
- 6.Stop watch. Write down the time.
- 7.Repeat 3 times. Aim to improve each round.
🔄 T2 Practice
- 1.Set up run gear on a towel (shoes open, belt ready, hat).
- 2.Put on cycling shoes and helmet.
- 3.Start stopwatch.
- 4.Remove helmet, swap to running shoes.
- 5.Clip on race belt (number rotated to front).
- 6.Stop watch. Write down the time.
- 7.Repeat 3 times. Target under 60 seconds.
❓ Common Transition Questions
How long should transitions take?
For beginners at a sprint race, 3–5 minutes for T1 and 2–3 minutes for T2 is typical. Experienced athletes cut T1 to 60–90 seconds and T2 to under a minute. Practice is the only variable — the gear layout and sequence can be learned at home.
Where is my bike in transition?
Bikes are racked by bib number or first-come-first-served (race-dependent). You'll be assigned a rack or spot at registration. Walk the transition area thoroughly before the race starts — know your rack row, a landmark near your bike, and the paths in from the swim and out to the bike course.
Can I wear the same shoes for bike and run?
Yes, for a first sprint race. Running shoes on the bike is legal and many beginners do it. You sacrifice some power transfer vs. cycling shoes, but it simplifies the transition — one less change in T1 and T2. As you get faster, dedicated bike and run shoes become worth the extra transition time.
What is a flying mount and should I try it?
A flying mount is mounting the bike while running, rather than stopping. It saves 15–30 seconds in T1 but requires practice and clipless pedals. For your first race, mount safely at the bike mount line — the time saved from a flying mount is not worth the risk of a crash or a broken bike.